
xdd-plus简易部署教程
yum install git -y#国内机
git clone https://ghproxy.com/https://github.com/764763903a/xdd-plus.git
#国外机
git clone https://github.com/764763903a/xdd-plus.git#国内机
wget https://ghproxy.com/https://github.com/764763903a/xdd-plus/releases/download/v1.9/xdd-linux-amd64 -O xdd
#国外机
wget https://github.com/764763903a/xdd-plus/releases/download/v1.9/xdd-linux-amd64 -O xdd#赋予权限
chmod 777 xdd
#启动xdd
./xdd2022/01/04 19:30:00.843 [W] init global config instance failed. If you donot use this, just ignore it. open conf/app.conf: no such file or directory
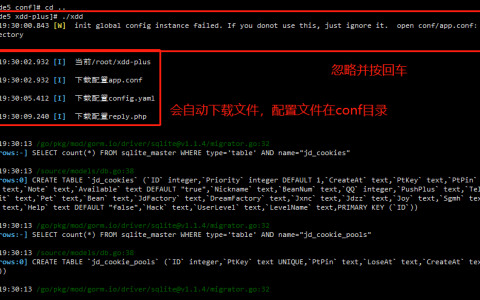 然后进入qbot文件夹拉取QQ配置文件,并修改
#进入qbot文件夹
cd qbot/
#拉取配置文件
wget https://github.91chi.fun//https://github.com//764763903a/xdd-plus/releases/download/v1.7/config.yml#管理员账号
qquid: 1234556
#机器人账号
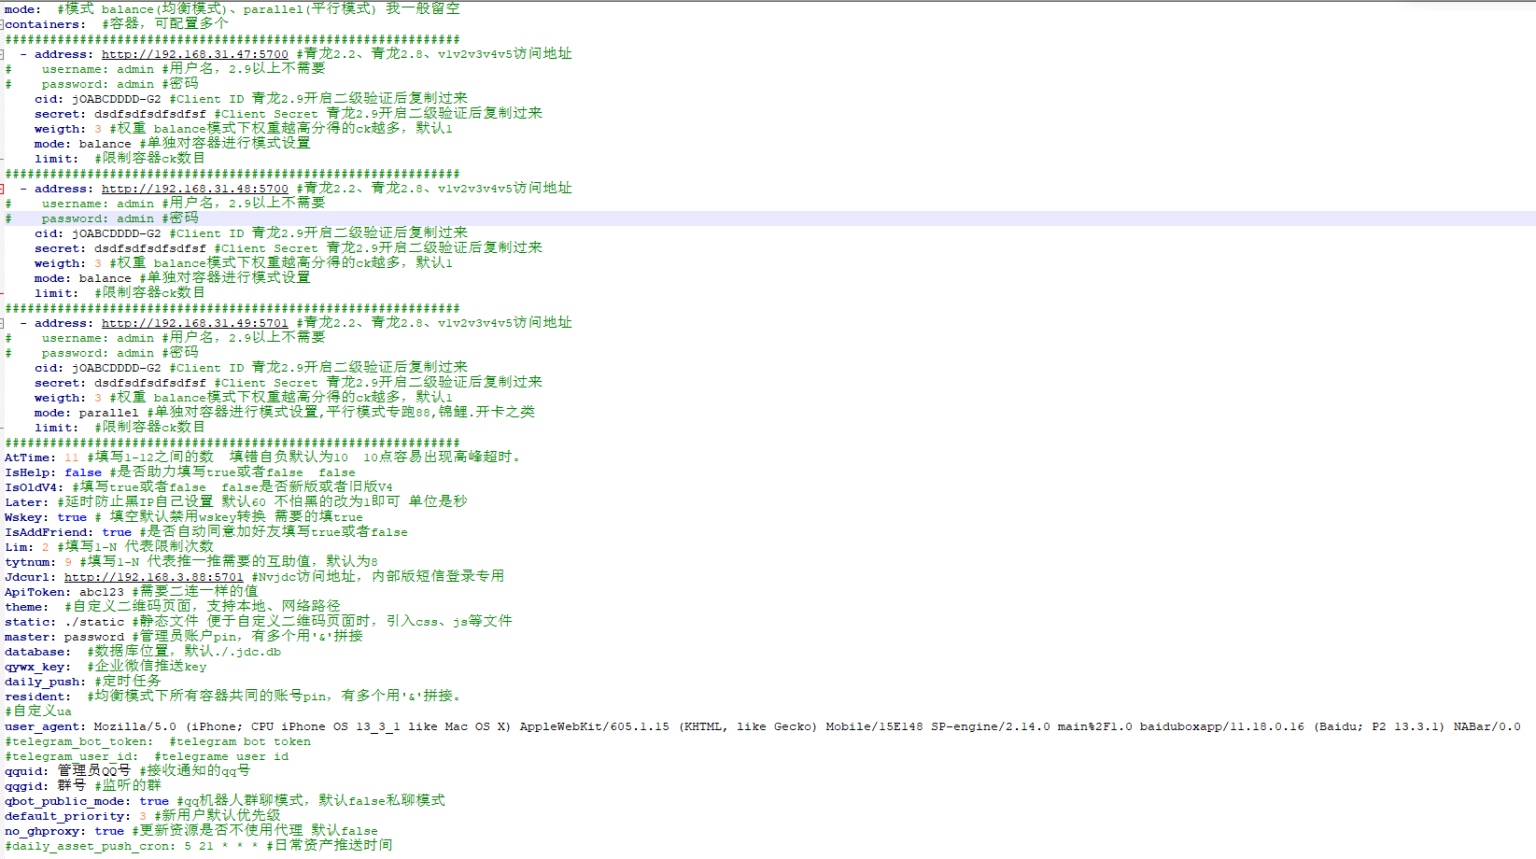
qqgid: 12345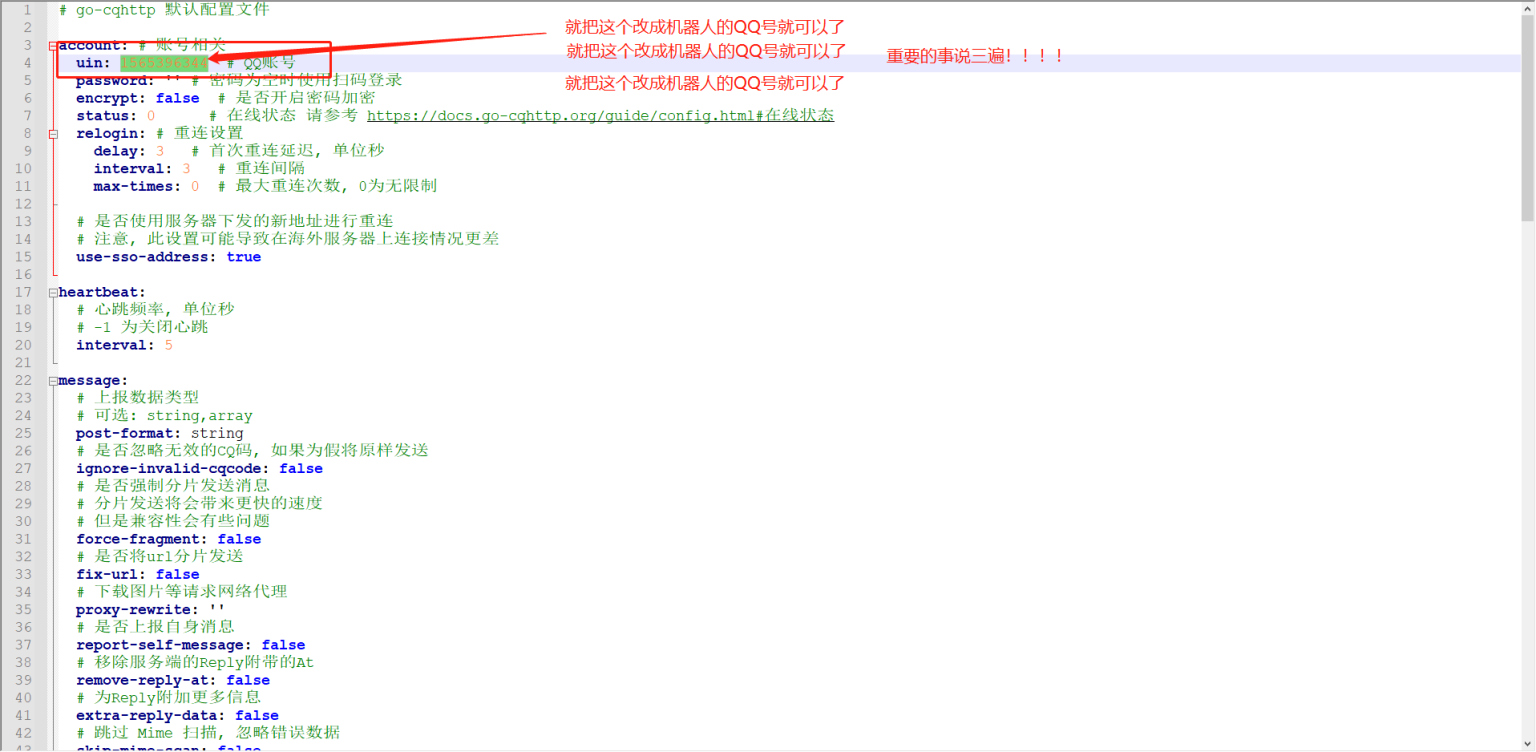 [c-alert type="info"]xdd配置文件详解[/c-alert]
版权声明:
本站所有文章除特别声明外,均采用 CC BY-NC-SA 4.0 许可协议。转载请注明来自
烟雨阁!
喜欢就支持一下吧